Distance Learning Training and Resources for Educators

Check Sheet for Fine Arts Faculty who teach Online

pc5kbkkcb

Before Classes Start

  • Check your Moodle Course Template and make sure you’ve copied the correct course over to your new template or if creating a new course make sure your syllabus is up to date, all learning modules are complete for the entire semester with appropriate assignments, quizzes, discussion forums, grade book and learning resources for each chapter/module.

Screen Shot 2018-08-02 at 9.21.34 AM

  • Review the entire course and check all videos, external links, due dates, and text chapter numbers to make sure all course resources, assignments, grade book and quizzes are viable, properly labeled, ADA compliant and up to date.

Screen Shot 2018-08-02 at 9.31.13 AM

  • All online courses must have a welcome announcement (see pdf at bottom of post for a sample) to be posted and sent out to students on the first morning of the course starting date, in addition to a thorough online course orientation explaining your expectations for your students and how the class works. A video orientation is a great way to do this, although a podcast or detailed announcement with screenshots is acceptable.

article-7-img30

  • Make sure you have Course Learning Outcomes posted in your Syllabus, in addition to your correct contact information, grading policy and your course specific expectations for your students.

blogging

  • The first week of an online course is critical to the success of any online course. This is when students get an initial impression (pro/con) of the class and instructor. I highly suggest you make it a point to welcome each and every student who posts their introductions to the “icebreaker” discussion board.  This small gesture lets the students know you are reading their posts and care about their learning.  Students are going to have a lot of questions the first week of the class.  Be diligent and proactive when it comes to answering student e-mails, texts, phone calls and discussion board questions.  Students get discouraged and overwhelmed easily that first week any they look to you to help them understand how to navigate your online class and what you expect from them.

Screen Shot 2018-08-03 at 2.07.42 PM

  • Don’t assume your students know how to use the Moodle platform and don’t assume they completely understand your expectations for them. Be flexible with your students that first week or so as they climb the learning curve of how to use Moodle and submitting assignments and/or posting to the discussion board.

confused-student

You may consider adding a Moodle FAQ link into your course information module. https://docs.moodle.org/35/en/Student_FAQ

Screen Shot 2018-08-02 at 9.35.13 AM

  • Make sure your course navigation is simple, consistent and has visual continuity. It should be is accessible to all students. See this checklist to cross -reference your course to ADA compliant. https://drive.google.com/file/d/1HZKSOfhyuWffz9SkfJTQ_zlfJQB1lD1/view
  • I use Labels in each module to separate the Assignments from the Learning Resources for that specific module. I keep this design approach consistent throughout the course. Each week my students know exactly where the discussion is and the quiz – then underneath are the resources I give them to help generate ideas for the discussion and research the quiz and/or essay.

Screen Shot 2018-08-12 at 1.05.05 PM

During the Semester

7e273-students2bbecome2bteachers

  • Be engaged in all online Discussions! This is crucial! The Discussion Board is essentially your classroom and the instructor is the moderator / facilitator of the Discussion Boards.

Screen Shot 2018-08-12 at 1.10.25 PM

  • Make it a point to give viable feedback to a “cross-section” of students each week to let them know you are monitoring the discussions and adding to the dialogue. I recycle many of my discussion board responses from semester to semester (big time saver) and only have to change the students name and possibly a final sentence or two offering suggestions such as asking the student to elaborate or to give me a specific example to illustrate their post.

student-success8

  • It’s recommended that you post (e-mail) weekly announcements updating and reinforcing material that was just covered and introducing/explaining new upcoming course content. (see example)

weekly20announcements1

  • Post grades in a timely fashion and make sure students understand your grading policy. This is best achieved by creating rubrics for your assignments and the discussion board. I give students a 24 hour grace period before grading discussion boards and essays – once I grade the module I deactivate it and make it unavailable to students.  Leaving assignments available to students after the due date gets them confused and just clutters up your moodle platform. (See sample discussion board rubric)

 Screen Shot 2018-08-02 at 9.50.59 AM

  • Return student e-mail in a timely manner. This is important!

excel-send-email-featured-670x335

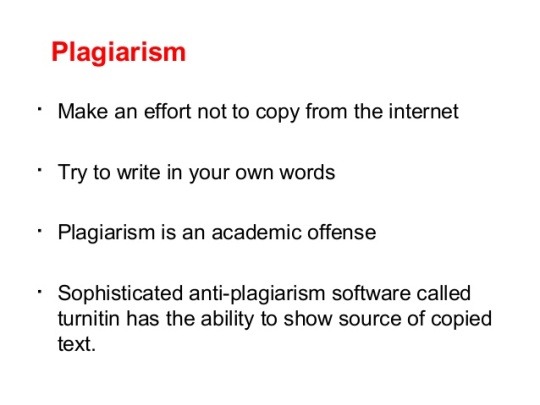
  • Make sure students understand what plagiarism is and that it is not acceptable in your class. This is a big problem and I have my students watch a video the first week of the semester about how to avoid plagiarism.  (See Plagiarism Document)

 lecture-1-applied-marketing-strategies-16-638


  • Contact any student that is struggling (behind or failing) in your class and ask what you can do to help him/her get caught up and/or raise grades.

Final Week of the Semester 

  • Post an announcement addressing and explaining your final exam (projects, discussions, extra credit) to your students.

Screen Shot 2018-08-02 at 9.57.30 AM

  • Make sure your Moodle grade book is up to date so students know where they stand in your class.

Once Semester Ends

Screen Shot 2018-08-02 at 10.01.53 AM

  • Send a final announcement reinforcing the learning outcomes of the course and it is a nice gesture to wish them good luck in future classes.

Screen Shot 2018-08-03 at 2.12.03 PM

  • It is also a good idea to review your grading policy with the students in this final announcement (see pdf below) so there is no question as to WHY a student got a certain grade. Let them know they can contact you if they have a question about their grade.

mecomputer
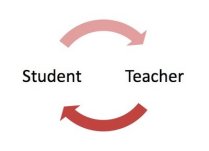
In summary… teaching online takes more time and effort on the part of both students and teachers.  Students are not spoon fed the material in an online class.  They are responsible for the readings, tests, discussions and other course assessments.

Successful online teachers on the other hand can work from anywhere, however he/she must stay engaged in the course and be willing to give feedback on a regular basis, grade assignments in a timely and consistent manner and be available to students who have questions.  This can be done using e-mail, phone or skype.

Top Ten Tips for Online Teaching

Sample Moodle Documents

###

the-beginners-guide-to-blogging

Presenter – Patrick Keough Semi-Retired Photo/Art Instructor and DL Administrator

mepresent

Blogging Overview

Keo Blog

Step-by Step Set-up Guide for a WordPress Blog

Q&A

KeO BLoG

Another semester of online teaching has come to an end. I submitted my last set of grades yesterday and woke up this morning with the realization that I didn’t have to check into the discussion boards for my various art and photography online classes.  I actually have some down time until classes kick back in on January 9th. Its going to take me a day or so to get used to this change in my routine.  I retired from full time college administration and teaching 2 and 1/2 years ago and after a 6 month hiatus went back to work teaching what I love and am passionate about.  Art History, Computer Art and Photo Appreciation.

faculty_training

I love what I do and am very happy to be retired and able to work from home or anywhere there is a WiFi hot spot.  Many people don’t realize just how demanding online teaching…

View original post 567 more words

KeO BLoG

Online Learning

I’ve spent the entire summer upgrading and retooling all my online courses for the fall semester that kicks in tomorrow and Monday.  I’m always excited about the start of a new semester, even though I’ve been teaching college level art and photography classes for 30+ years.  I officially retired from full time college administration and teaching 2 years ago however I’ve worked my way back up to taking on a full load of online classes this fall to include Computer Art, Art History, Photo and Art Appreciation.

I now teach for 6 North Carolina Community Colleges from home, local coffee shop or anywhere my travels take me for that matter.  It’s empowering to be able to teach my classes from anywhere in the world – as long as I have a wireless connection and my laptop computer I can access and teach my classes and connect with my students. That…

View original post 643 more words

I recently attended and presented at the NC3ADL Distance Learning Conference.  It was great to see my old friends and colleagues at the Raleigh Convention Center especially since I retired from full time teaching and distance learning administration at Carteret Community College.

Presenting at the NC3ADL Conference

Presenting at the NC3ADL Conference

One thing that struck me while attending one of the conference sessions was just how many amazing and powerful digital tools and applications we as educators have at our disposal for delivering (teaching) our courses compared to 20-30 years ago. The digital (internet) age has changed (impacted) education at all levels dramatically.

The question I have is… are we graduating smarter more prepared students because of all these new, powerful and sophisticated instructional tools and applications?  I hate to admit it, however, I would have to say no if I were to base my answer on my personal experiences as an online educator. Students and teachers now have access to endless amounts of information with a click of the mouse, more than any time in human history.  Is this seamless and easy access making us smarter? Is it making us better teachers? Is it making our students smarter and more prepared for viable careers after they graduate? Are all the technological tools, applications, systems, networks and sophisticated software making the educational experience better and more effective than 20-30 years ago? I think this is a conversation we as educators need to be having.

Could the inundation of information and digital tools like cell phones, laptops, tablets and IPads and IPods make us more distracted and possibly overwhelmed to the point where we can’t possibly process the vast amount of data and information coming at us from commercial, political, and educational realms.

Speaking for myself I feel somewhat overwhelmed by the constant flow of digital content coming at me from morning to night. I teach exclusively online and incorporate a wide array of instructional material into my online classes. Everything from podcasts, screencasts, instructional videos, graphics, animations, and text based content.  Teaching and learning in 2013 is so incredibly different than it was back in the 1950’s, 60’s and even into the 80’s before the computer and the internet.

Students now have the same access to information their instructors have. Is it now the teachers role to help students decipher this information, make sense of it and put it into context?  The roles and relationships between teachers and students is certainly changing (evolving) and have been for the past 15 years.

I personally think there are a lot of unanswered questions when it comes to the state of education in America. We certainly spend more than any other country on schools, colleges and education in general.  I’m just not convinced we are getting the best bang for our buck and I wonder if we could be doing a better job with the incredibly powerful instructional tools and applications we have at our disposal as educators in the digital realm.

Could it possibly be that the technology could possibly be getting in the way and/or inhibiting the process of learning?  I see many students struggling to stay focused on one learning activity  (task) because he/she is distracted by checking facebook, texting or surfing the internet. There may be more to this than we as educators think and we may have to come up with new and creative strategies for dealing with and addressing these issues.    Just sayin…..

Here is the world education ranking for 2012. USA dropped to 17th in developed countries. Finland and South Korea kicked out butts! Can’t we do better than this?

Click Here for Global Report on Education.

Sally Roy recently created a video detailing the pros and cons of online learning. The project profiles real students who have had experiences with online education and features their discussions around the positive and not-so-positive qualities of online and offline education.

Screen Shot 2013-08-06 at 11.11.56 AM

Click Here to View the entire video interviews.

Excerpt from this Project…

“To log in or not to log in? That’s the question for thousands of students like you, who now have options that their parents didn’t have when it comes to obtaining higher education. No longer does a student’s college debate center solely on the old question about state schools versus private education. Online schools have become legitimate sources of knowledge and career training, and students now have another major decision to make when it comes to choosing a school.

As the idea of earning your education online becomes more socially acceptable, more students are choosing to earn their education through online schools every year. It fits easily into busy schedules and can be a life-saver for nontraditional students who have concern like work and parenting. And although traditional college students—that is, students who have just finished high school and are heading to college for the first time—are also enrolling in online schools, many students have questions about the differences between online and offline schools.

Their concerns are not necessarily eased by the swarm of information, facts and figures that are offered by dozens of different online schools. It can be overwhelming to attempt to take in all of this information at once, and it’s easy to lose sight of what your number 1 concern ought to be: is online school the best choice for you?”

Comments are welcome and encouraged…

Key Tips for Teaching an Online Courses

images

I developed these online teaching tips based on my 15 years experience teaching art and photography on both Blackboard and Moodle Course Management Systems.

 1. If possible…kick the first session (class) off with a synchronous BB Collaborate, Google Hangouts or Skype orientation that addresses exactly how you are going to teach the class and be specific in your expectations for the course participants. Sharing your screen and guiding them through your Moodle/Blackboard courses is an effective way to do this. You will also have to demonstrate how the Moodle (BB / LMS) tools (assignment upload and discussion forum) they will use for submitting work for you to evaluate / critique. If your course is totally asynchronous then create a video orientationto the class. I do one for every online course I teach.

2. Eliminate all gray area from your weekly assignment directions (course expectations) and make it very clear as to exactly what you want your students to do each week and how the students will submit work and engage you and each other in discussions and/or critiques.

3. KISS RULE!!! Keep it Simple as to class assignments and the instructional design plan you implement in your online courses. The more complex your online course the harder it is for you and the students to manage.  You want visual continuity in your course design scheme as well as content continuity as far as how you lay out your assignments, lectures, videos, discussions, etc.

4. Less is More! Remember don’t overload your students with too many assignments / activities. I rather do one or two task each week and do them well than 3 or more activities that may be difficult to manage for you and the students.

5. Be Present and Proactive! This is probably the best advice I can give you. Respond back to student questions and discussion posts in a timely fashion. Essentially follow through on your part as to when you are going to give students feedback on their work. I use the discussion forum as a place for students to submit works in progress and as they post images I go in daily and give them feedback. You set the parameters as to when you will respond back to students and just follow through with the course guidelines that you set.

6. Be Flexible! Students are going to run into technical or personal issues so to keep the stress level down It’s important to be flexible with due dates if a student is running into a problem due to unforeseen circumstances.

7. Synchronous vs. Asynchronous instruction. Use the synchronous approach (if possible) to kick off each weeks lesson and to explain exactly what you want your students to do and how you are going to engage them about their work. This can be in the form of a Power Point presentation or taking them through your Moodle or Blackboard Module step by step. Approximately 80% – 90% of you instruction will most likely be asynchronous in most cases.

8. Be aware of Online Learning Limitations. Its important to design learning activities that are conducive for the online environment. You may find that critiques are best for your class in synchronous mode (BB Collaborate, Google hangouts, or Skype with Join Me Screen Sharing for example). Do what works best for you and your teaching style.

9. Practice makes perfect. There is no doubt the more you teach online the easier it gets and the more proficient (and comfortable) you get engaging students in the online environment. Be prepared to change course if certain learning activities are not working effectively for you.

10. Above all else…Have Fun! Share in the learning journey with your online students! If they see you are passionate and engaged about your course material and giving them constructive feedback on their work in a timely fashion the course will be a success.

###

Harnessing the Tools and Technologies for Online Teaching.

technology


E-Learning is growing at such a rapid pace because it is…..


• Market Driven
• Student Driven
• Technology Driven
• Budget Driven

Education at all levels is changing very rapidly (understatement)

Question we must all ask ourselves…

Do we want to be behind the technological curve or ahead of it?

If we want to stay ahead of this technological wave then we must harness and effectively implement the technology we have at our disposal for delivering and assessing our course content.

1. Master the LMS (Learning Management System)

Moodle / Blackboard / Angel etc.

2. Look at your CMS as your teaching / learning hub.

From your CMS platform you can add a variety of “open source” tools that can enhance / enrich the online learning experience.

3. What other online tools/applications do you want to incorporate into your CMS

Skype, YouTube, ITunes U, Join.me, Twitter, Blogging, Jing, Photobucket, Flickr, Voicethread, to name a few.

4. Develop an online teaching methodology that is a reflection of your personal teaching style and draws from some e-learning best practices. An approach that enables your personality to come through. An approach that lets students know there is a compassionate, engaged, enthusiastic teacher on the other end that sincerely cares about their learning and success. This is the biggest challenge or online educators in my opinion and will take the most time so don’t get frustrated as you are climbing this learning curve.

Lets take a look at a cross section of these online tools and see what each one does best as to instructional delivery.

Each tool/application in the CMS plays a specific role in delivering (and/or assessing) your course content (instruction) and then you add additional tools to broaden and enhance the functionality of your course.

Within the CMS

• Discussion Forums
• Assignment Manager BB / Advanced Uploading of Files Moodle
• Lessons / Create Web Pages/Glossaries
• Test Manager (BB) – Quiz Function Moodle
• Blog / Wiki / external links
• Announcements

e-learning

Open Source (Outside CMS)

YouTube and Vimeo

Great for embedding tutorials that either you create or find on Youtube into your course. YouTube for lectures under 10-15 minutes and Vimeo for over 15 minutes.
Anything you ever wanted to know about Photoshop for example is in a tutorial on YouTube. You just have to sift through and find and embed the best most viable tutorials for your lesson.

Slideshare.net

Great for embedding powerpoint slide shows / lessons directly into CMS instead of linking to them for download.

Jing / Screenflow / Camtasia

I use these tools for screencast tutorials. You can record your screen and your voice as you demonstrate a technique in Photoshop or In-Design for example. Jing for quick and dirty and Screenflow for longer presentations. These can be linked or embedded directly into Moodle or Blackboard.

Audacity for Audio Editing Podcasts

Excellent (FREE) audio editing software. Very shallow learning curve to let you create audio podcasts (MP3’s)

podcasts

Enhanced Podcasts (Illustrated with images / video)

Great for demonstrating “hands’on”  activities like a dissection in Biology or Chemistry Experiments.

IMovie, Movie Maker or Camtasia will allow you to create visually sophisticated enhanced podcasts for your lectures and demonstrations.

Once I create these I will upload to ITunes U, YouTube and/or Vimeo and embed them into my courses. These do not have to be fancy or highly sophisticated productions. I usually have a student keep an eye on my video camera as I demonstrate a basic lighting technique on the sweep for example. After class I put a title on it – edit out any bad spots and then embed it into the Blackboard or Moodle class.

Join.meYuuguu (Screensharing)

Low budget way to share your screen with students for “real-time” synchronous critiques. Just send the students a link and they are viewing your screen. You would use this in conjunction with Skype so you can all have a conversation while discussing a Photoshop technique or critiquing an image.

Skype  (online office hours, conference calls and screensharing)

Google Hangouts! Great for lectures, demonstrations, critique sessions and student meetings or real time lectures.

I find skype and google hangouts bot invaluable for office hours and online meetings. Students seem to be very open to meeting me on skype to discuss a project, look at work or just discuss a school or personal issue.

Twitter for Reminders and Course Updates

We have faculty using Twitter for sending out updates (reminders) to students about various course related projects, due dates, course changes and share short bits of information. All students are asked to create a course twitter account and subscribe to the instructor. I see a lot of possibilities with this tool.

Drop Box

Great for storing images or have students place their work in a central location for you to evaluate and/or critique.

Voice Thread

Another excellent quick and dirty voice with images application that you can embed into a discussion board or anywhere into a CMS.

WordPress Blog for easy web e-portfolios, journeling, travel logs, marketing.

I am a big proponent of blogging for educational purposes and e-portfolio’s.  All my student set-up a portfolio blog the 2nd year of our Photo Program. They set-up pages for each discipline like Portraiture, Sports/ Action, Fine Art, Documentary, Commercial Illustration in addition to posting their artist statements, resume’s etc. Click Here for an example from one of my graduating students. Ira Morris BloG

Rachel Eddins Photo Blog

ITunes U

Excellent and expansive resource for instructional podcasts and video content. You just have to search for topics that relate to your course and download the podcasts and embed them into your course. All ITunes U colleges must sign an agreement that everything they upload to ITunes U is free to anyone who wants to use it in their online courses for edicational purposes. There is a vast array of Photo History Lectures in ITunes U for example. Why reinvent the wheel when someone has already created and made available excellent photo/art media content.

ITunes U Carteret Site

This is the student link to my College ITunes U site. I have over 200 audio and enhanced podcasts in my various photo course tabs. Students can download my podcasts (lectures and demonstrations) to their mobile devices or watch them while sitting at their computer. I do all my exam reviews as podcasts and students download them and listen before taking the exam.

Photobucket and Flickr

Online repositories for storing, sharing and commenting on images. You can have students post a link to their photobucket album or flickr stream to the discussion board and then you can review – post comments and help with editing and sequencing their pictures. Flickr seems to have more functionality for editing and sequencing than photobucket.

IMovie / MovieMaker

IMove for Mac users for making quick enhanced podcasts and instructional videos – Movie Maker is the alternative for PC users as far as being easy to use and enables you to create videos that can be uploaded to YouTube, Vimeo or Itunes U.

Keynote

Take a PowerPoint and add narrative then save as a mov. or MP4 file

dragonDragon Naturally Speaking

I would imagine this software is going to be invaluable to effective online instruction and a big time saver for those of us who are burned out with typing.

Yammer – Educational Social Network

Check this cool “free” educational social networking tool out. Essentially like a facebook interface for communicating and engaging students and colleagues on a variety of topics. You can embed video and audio into it as well. I use that as a communications tool for all my Distance Learning Faculty at my college for sharing ideas, accomplishments and anything related to distance learning.

tutorials
YouTube – Thousands of Instructional Videos and Tutorials on just about every subject.
Adobe.com
Lynda.com

Each one of these online tools and applications can help you deliver and assess your course content and some will enable you to engage your students effectively in the online environment.

The trick is to know WHEN and WHERE and HOW to use them most effectively to accomplish whatever learning objective you are addressing.

evolving

You must be aware that these online tools and applications are constantly evolving and changing and you have to retool your courses accordingly.

elearningOnline faculty must accept the reality that there is no standing still in the world of e-learning. We are life long learners and essentially students as well – the online environment has forced us to be facilitators / moderators and guides to the learning journey instead of the sage on the stage.

Those educators who are aware of this reality and ready and willing to navigate the digital / technological terrain will be the most successful, in-demand and marketable.

Anatomy of an Online Course

course image

Being a  educator in the year 2013 is NOT anything like it was in 1987. Not only do we have to know our course content area and be able to teach it effectively. Now we have to be able to teach effectively in a whole new (cyber) environment and be able to weave seamlessly between physically seeing (teaching) our students and communicating (instructing) them totally online.

new skill sets

This takes new sets of skills and a heightened awareness of the challenges the online environment presents us. Harnessing (mastering) this instructional technology and methodology is going to make you more marketable as an educator.

There is no doubt teaching online is a challenge. You must go into it with your eyes WIDE OPEN. The first few years moving your traditional courses over to the online environment takes time and effort climbing the learning curve. There’s no getting away from this reality. The good news is…the more you teach online, the easier it gets. Once you’ve built your online courses and develop a solid grasp on how to manage and teach via the web things get progressively easier.

online teaching

There really are no shortcuts at the very beginning of this process. You have to build your courses and transition yourself and your teaching methodology over to being comfortable, proficient and effective in the online environment.

rethink


Essentially you have to totally RE-THINK how you are going to teach because what works in the traditional classroom doesn’t usually work for the online environment.

Step #1 – Gather all the course content (assignments, lectures, videos, web resources, Powerpoints, etc.) you have and begin organizing it by week. If you are teaching a 16 week semester you have to take a good hard look at your syllabus and course outline and then break (pace/distribute) the assignments, projects, assessments and learning outcomes up over a span of 14 weeks. Leave the first week for course familiarization and last week for wrap-up and exam or final projects.

blackboard vs. moodle

Step #2 – You have to become proficient with the course management system (CMS) your college is using before teaching online. That means taking workshops and taking time practicing adding content and learning the various functions and applications within the CMS (Blackboard, Moodle, WordPress, Angel, Campus Cruiser, etc.) Please note…all CMS’s do the same thing! They are online tools for delivering and assessing course content. If you can learn one CMS you can quickly learn another – it is like driving Buick vs. a Honda.

Step #3 – Once you are proficient with the tools and applications in the CMS and get all your course content loaded, organized and designed within a design scheme then you want to have someone look it over to check if the course expectations are communicated clearly. Sometime we know are material so well we just assume we are being clear when in fact we may assume too much. All course expectations, assignments, discussions and assessments must be crystal clear with no grey area.

brainstorm

Step #4 – Introspection, brainstorming and Soul Searching Time! You have to visualize (analyze) each assignment, assessment, project and course expectation then consider how you teach them in the classroom/studio and then problem solve just how you are going to deliver and assess them in the online environment. There is no one size fits all solution to this and your teaching style plays a role in how you go about it.

e-learning vs. classroom

Step #5 – Once your class is completely migrated from classroom to online its time to be baptized in fire and teach online. Best approach would be to start with a hybrid/blended course (partial online) and work your way to totally online. You are going to make mistakes and will learn from them.
Every time you teach online you will get better, more efficient and comfortable working in that environment.  Effective and efficient workfow and file management are also very important variables when teaching online. They can make or break your effectiveness and keep you from losing your mind from being inundated by student assignments, discussions, e-mails and giving viable feedback. Migrating your traditional classroom courses over to online delivery takes a great deal of thought,  rethinking and planning and should not be taken lightly.

The goal for all of us is to replicate as best we can our unique, creative and dynamic approach in the classroom into the online environment.


I am in the process of creating a step by step procedure for incorporating Google Hangouts into your online courses. It is a great new and free tool to help you teach and engage students. If you have any tips or resources for me to add for using Google Hangouts for educational purposes please post them in comments.

Click here to check it out!

Screen Shot 2013-03-30 at 6.40.25 PM